
Petite Chocolate Piping Cone
While baking, I often think, “I just need to decorate with a little bit of chocolate to make this cuter, but it is such trouble to prepare it”, or “the store-bought chocolate icing pen has too much icing in it and it's hard to use; and besides, I don't like the taste of it”. That's how I came up with this petite piping cone that I can keep in stock.
Since the parchment paper is slippery and hard to roll into a cornet, the key is to press the center point with your left thumb nail and roll your right hand at the wrist without moving the paper itself.
But the most important thing is to get used to it.
Practice making a lot of cornets and it will become easier. Recipe by KK.
Steps
- 1
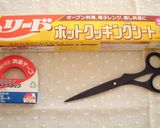
These are the main tools you will need.
- 2
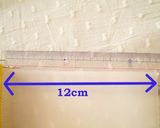
Cut off about 12 cm of parchment paper.
- 3
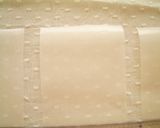
Divide the parchment paper into 3 rectangles.
- 4
Diagonally cut each rectangle in half to make triangles.

- 5
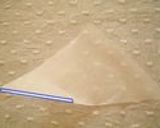
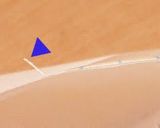
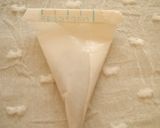
Apply double-sided tape on to the edge marked with a blue line as shown in the picture.
- 6
[Helpful Hints] Fold down a small section of the end of the double-sided tape firmly to make it easier to peel the liner off. If you apply the tape onto the parchment paper without leaving this edge, it can be incredibly hard to take the liner off and you may become very frustrated.
- 7
Making this little “tab” will make it much easier to take the liner off. [End of Hints]
- 8
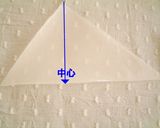
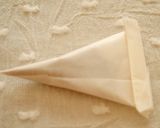
Roll the parchment paper into a cone shape, with the center at a right angle to the vertex. Do not remove the liner of the tape at this point.
- 9
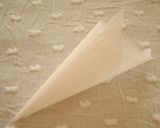
Using your fingernails, seal the double-sided tape firmly to secure the cone. This is called a cornet.
- 10
Finely chop a little less than 1/4 of a piece of chocolate with a knife.
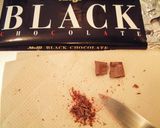
- 11
Fill the cornet with the chopped chocolate.
- 12
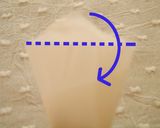
Fold the tip of the cornet at the edge indicated by the dotted blue line as shown in the picture to close the open end.
- 13
Fold the edge twice, then secure it with another piece of double-sided tape. Make a "tab" with the double-sided tape again.
- 14
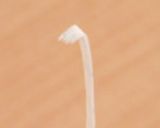
This is the end product. When you use it, heat it up to soften the chocolate, then cut the tip off to pipe out.
- 15
Microwave heating instruction: Heat the cornet for one minute, then heat it in 20 second increments, until softened. Adjust the heating time according to your microwave.
- 16
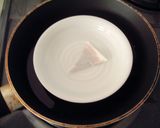
The perfect way to warm it up: In a skillet, pour in 2-cm of hot water and bring it to a boil. Place a small plate on top of the hot water and place the cornet on top of the plate. Leave it for a few minutes and the chocolate will be softened. (Be careful not to let any hot water on the plate.)
- 17
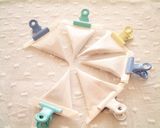
Since the parchment paper is slippery and the double-sided tape does not stick too well, use a small clip to pinch the tops when saving for later use. Store them in the refrigerator.
- 18
These are handy to use for cookie decorations that need only a little bit of chocolate.

- 19
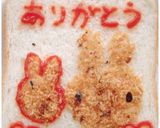
Replace the chocolate with ketchup, and now you can write a message on a piece of bread.
Cooksnaps
Did you know that you can import recipes from anywhere into Cookpad with one click?
https://blog.cookpad.com/us/cookpad-recipe-import-feature-save-recipes-from-anywhere/
Download Cookpad app to plan your meals and store your cooking ideas in one safe place! https://cookpad.wasmer.app/us/download
Similar Recipes
More Recipes
-


-


-


-


-

Lemon Dal/ Lemon Tuwar Dal For Summer

-


-


-


-


-


-

Ray's' Asiago Penne Chicken Pasta

-

 jeffineer
 -


-

Apple Pie with Steamed Apples Made in a Silicone Steamer

-

Pan-fried Chicken & Cabbage + 3 Other Veggies
-

Meatball risoto with mushrooms

-

-


-

Spiral Anpan Made with a Bread Machine
-

-


Comments