
Caramelized Apple Upside Down Cake
This is a cake I came up with after getting a request from a former high school classmate for a Christmas cake. Her husband wanted something else, and she wanted an apple cake, so following the rules of society I went with her wishes. But the caramel flavor was requested by her husband.
When you put the apples in the caramel, it cools down rapidly and hardens, but as the apple is simmered it melts, so it's not a problem. By microwaving the apples first, when simmering them with the caramel, they will cook faster. Boiling and making the apples soft will make it easier to layer them as shown in the photos. Recipe by nin
Cooking Instructions
- 1
Bring the butter and eggs for the batter to room temperature.
- 2
Make the caramelized apples: Peel and core the apples and cut into 16 wedges.

- 3
Put the apple slices in a heatproof container, sprinkle with lemon juice, and cover with plastic wrap. Microwave for 6 minutes at 500W, stirring the apples every 2 minutes.

- 4
Mix the granulated sugar and water together in a frying pan and heat on medium.

- 5
Cook while stirring occasionally with a wooden spatula until the sugar becomes caramale colored. Once it starts to color, it changes very quickly so be careful.

- 6
Add the apple slices with the juices (the caramel will splatter, so be careful). Add the rum also. Simmer over medium heat while making sure the caramel coats the apple slices evenly.

- 7
Mix occasionally so that the liquid coats the apples, until it's reduced to about 1 to 2 tablespoons or so.

- 8
Butter the cake pan, pour the liquid in first, then line the bottom with the apple slices. See steps 9 and 10 for how to layer the apple slices.

- 9
Combine 3 slices of apple and put in the middle. Place 6 slices around that, layering them on each other.

- 10
Keep layering the apple slices, overlapping them slightly. See the "how to layer the apple slices" instructions below.

- 11
Make the batter. Add the soft brown sugar to the softened butter, and cream together well.

- 12
Add the beaten eggs in 3 batches, mixing well each time so that the batter doesn't split between additions. Add the milk and mix well so that the batter doesn't split.

- 13
Sift the cake flour and baking powder together as you add them to the batter, and mix in completely.

- 14
Pour the batter into the cake pan over the apples, and level it out with a spatula. If you tap the pan (the usual method for leveling out cake batter) the layered apple slices will shift around.

- 15
Bake in a preheated 170°C oven for 35 to 40 minutes. If a skewer inserted into the middle comes out clean, it's done.
- 16
Leave to cool in the cake tin. When it has cooled down a bit, place a board on top and flip it over to remove from the tin. Leave as is until the caramel has solidified.
- 17
Layer the apple slices, like this so that the top part of each slice will be on the surface when you turn the cake upside down.

- 18
This way of layering them is easier, but it doesn't look as nice since the core part of the top half of each slice will be hidden.

Cooksnaps
Did you make this recipe? Share a picture of your creation!

Similar Recipes
-

Easy! Caramel Squash Upside Down Cake Easy! Caramel Squash Upside Down Cake
How to make easy fluffy squash (pumpkin) cake, it's a soft cake with rich caramel squash (pumpkin) over it. Please try it with your family and friends.
-

Raisin and Berry Upside Down Cake Raisin and Berry Upside Down Cake
I adapted a pineapple upside down cake and the image of an apple tarte tatin to make a fall-colored, cranberry, raisin, and almond cake. The addition of almond flour in the batter makes it fluffy.When it cools, the sugar you mixed with the fruit will caramelize and make it hard to cut. In this case, lightly microwave before cutting. Recipe by Yukirinrin
-
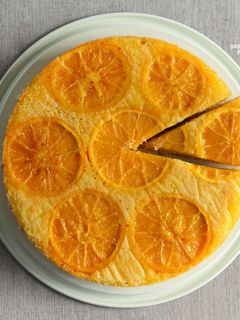
Orange Upside-Down Cake Orange Upside-Down Cake
Here is a refreshing citrus cake to make at home. The smell of orange will fill up the air as you prepare this cake.
-
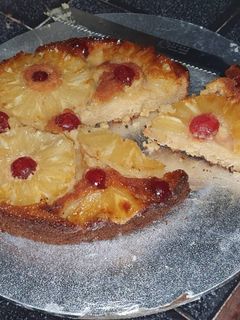
Pineapple Upside Down Cake Recipe Pineapple Upside Down Cake Recipe
I love pineapples and when it comes to baked pineapple desserts you just can't forget a pineapple upside down cake. This is my version of it and it is absolutely delicious and the recipe is also fairly simple using just a whisk. I hope you try it. You will love it.
-

Pineapple Upside Down Cake Pineapple Upside Down Cake
Super simple vegan cake recipe. Makes a small cake
-

Pineapple Upside Down Cake Pineapple Upside Down Cake
I got a pineapple and I've got a cake. Uhh!! Pineapple upside down cake. With something sweet and tangy and just the right amount of saltiness makes it all a perfect combo. Try it with tea, milk, juice or coffee and see the difference.Hello everyone!!! Kindly visit CookingMummy fb group. https://www.facebook.com/groups/1336521093091523/ . Join us and start selling/buying freshly homecooked meals as well as baked goodies too. You can also post your recipes here!! Happy Cooking!!https://www.facebook.com/cooking.mummy/
-

Pineapple Upside Down Cake Pineapple Upside Down Cake
My uncle was the first one I saw make this cake when I was about 18 years old. It was really magical. No, not because of all the partying that was going on. I was just amazed at how good it looked. If you don’t want to go through the hassle of making your own cake, a Yellow Cake Mix will do the job along with some pineapple rings.
-

-

-

Cranberry Upside-Down Cake Cranberry Upside-Down Cake
This is my variation of a recipe found in our local paper that I have held onto for years. The original recipe is cranberries over a simple vanilla cake. Naturally, it needed to be enhanced with cranberry's soul mate, oranges. A delicious addition to any holiday meal!
-

Pear Upside Down Cake Pear Upside Down Cake
When I had first eaten a pineapple upside down cake, I started thinking about a pear upside down cake. I head it couldn’t work because the pear released so much liquid. Years later, I saw something on PBS, they made one from scratch with the addition of corn starch to absorb some of the liquid released by the pears. This is my first attempt at a pear upside down cake and I did it similar to the way I’the make the pineapple version. Don’t shame me for using the boxed cake mix 😏. The cake was actually very balanced and not overly sweet. It wouldn’t be a bad idea to top it with a warm apricot jam or something similar. -
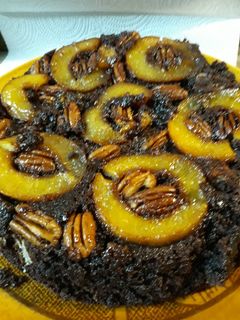
Peach Upside-down Cake Peach Upside-down Cake
A tribute to the Great State of Georgia. I love peaches and pecans!!! Georgia has both of these in great abundance. Made this for my daughter's birthday. #mycookbook
More Recipes

Comments