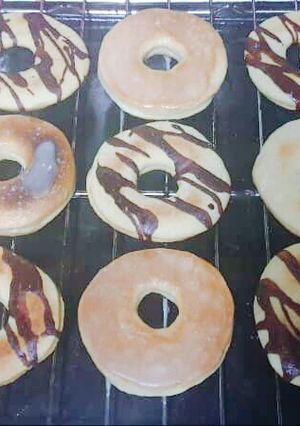
Baked Doughnuts
These are simply so good and just as delicious as fried doughnuts. This is a keeper for all your doughnut cravings and they go well with pretty much any toppings or stuffings. They do take a while to make as they are yeast doughnuts but they are more than worth it.
If using active dry yeast, add to the wet ingredients and let sit for about 10 minutes before adding to the dry ingredients.
Also, I made these in the evening so excuse me for the bad camera quality.
Steps
- 1
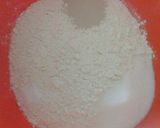
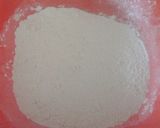
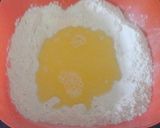
In a large mixing bowl, combine all the dry ingredients and mix well to combine.
- 2
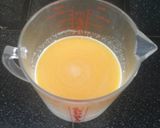
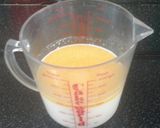
In a separate bowl or large measuring cup, combine all the wet ingredients and butter and heat just until the butter melts and the mixture is warm. This can be done in a microwave or over a stovetop.
- 3
After, make a well in the dry ingredients and give the wet ingredients a quick whisk before pouring it in the dry ingredients.
- 4
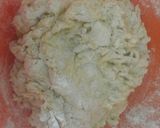
Then, with a spatula or wooden spoon, mix until all the flour is hydrated and a dough forms.
- 5
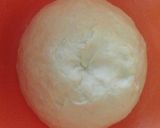
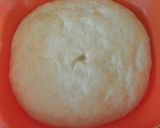
To continue, heavily flour a work surface with flour and turn the dough out onto the work surface. Knead for about 7 minutes by hand until a smooth dough forms, oiling your hands and flouring the dough and work surface as and when needed. After kneading, form a ball and gently poke the dough, if it comes back at you or it bounces back, it is ready.
- 6
Lightly oil the same bowl used for making the dough and place the dough in the bowl, cover with cling film or a clean kitchen napkin and place in your oven with the lights on and let proof for 1 hour 30 minutes. (Do not put the oven on!)
- 7
After the first proofing, take it out of the oven and gently punch out the gas.
- 8
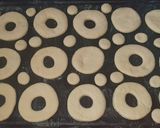
Turn out onto a heavily floured work surface and roll out the dough until desired thickness is reached (about 1/2 inch thick), then cut out the doughnuts into your preferred shapes and sizes and place them on a greased baking tray, spacing them out evenly. I did rings, doughnut holes and round doughnuts.
- 9
Cover the doughnuts and let proof again in the oven with the lights on for 30 minutes.
- 10
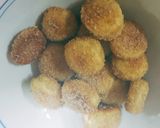
After they have puffed up nicely and about doubled in size, brush the tops with some melted butter.
- 11
Bake in a preheated oven at 325 degrees fahrenheit on the center rack for 8-9 minutes and then move to the top rack for an additional 8-9 minutes.
- 12
You know they are done when they become soft and golden brown and when they no longer look or feel doughy.(If that is a word😂)
- 13
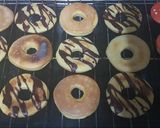
Let cool on a cooling rack until they are cool enough to handle. If adding toppings (please check out my 3 Simple Doughnut Toppings), add the toppings while still hot so they stick better. Happy Baking and Enjoy!
Cooksnaps
Keywords
Similar Recipes
More Recipes
-

Slow Cooker Spaghetti Bolognese
 Cook1999
 -


-

Sugar Snap Peas with Squash Noodles

-
 Maeli
Maeli -
 Maeli
Maeli -
 Maeli
Maeli -
 Maeli
Maeli -


-

Mushroom Swiss Burger Casserole

-


-

-


-


-

Yellow Bhuna Moong Dal with Coconut

-

-


-


-


-

Manx Queenies & Smoked Bacon In A Garlic Butter Sauce
")
-


")


Comments