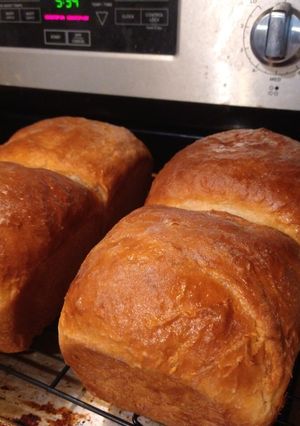
Nana's Old-fashioned White Bread
When treated gently this bread is light and airy, but always packed full of flavor. Even if you get a "reject loaf" (aka one that falls while baking) it is still delicious.
I don't use shortening in any of my own recipes, but if my Nana used shortening in hers I do not deviate for flavor authenticity and nostalgia purposes. I do use a "modernized method" to make mine because having carpal tunnel makes it difficult and painful to stir and work with thick doughs like this.
Steps
- 1
To make scalded milk, heat milk in a medium sauce pan over medium high heat, stirring frequently, just until it begins to bubble gently, primarily around the edges with a few bubbles starting to appear in the middle. Remove from heat immediately. Add butter to melt and let mixture cool to luke warm.
- 2
In the bowl of a stand mixer equipped with a dough hook add warm water, yeast, and 1 tbs sugar. Stir gently, then allow to bloom untouched 5 minutes. Add scalded milk/butter mixture, remaining sugar, salt, and first 2 cups of flour.
- 3
Turn mixer on to lowest setting until ingredients are just combined. Increase to next speed. Begin adding additional flour 1/2 cup at a time until dough begins to pull away from bowl. Stopping to scrape sides and check bottom is mixing as needed.
- 4
As soon as dough pulls away and starts forming a ball around the hook, stop adding flour and continue running mixer for 2 minutes more. If dough begins to climb hook shut off and scrape down slightly. Then start up again.
- 5
Transfer dough to a greased bowl. Turn once to coat. Cover with a lint free towel and allow to rise 1 hr in a warm spot (I put it in my oven with the light on).
- 6
When dough has risen punch down. Lightly grease 2 loaf pans. Turn dough out onto a lightly floured surface. Divide into 4 equal portions. Gently form each into a ball. Place 2 balls side by side in each loaf pan. Cover with towel and allow to rise 1 hr again.
- 7
After second proof preheat oven to 425°F. Do not punch down dough this time. Gently place pans in oven (careful not to bump pans or drop onto rack). Bake 20-30 minutes or until tops are browned.
- 8
Remove from oven. Brush tops with additional butter to soften crust if desired. Let loaves cool 5 minutes in pans. Transfer to a wire rack to cool completely. Or slice into it while it's still slightly warm. So, so good fresh!
- 9
To serve: Slice to desired thickness (1/2 thick is nice). Spread butter, jam/jelly, peanut butter, drizzle honey, etc. The toppings are endless for hearty homemade bread!
- 10
See notes below ⤵
- 11
Note 2: When forming balls, you are not actually rolling the dough into balls. Just pick up a section and gently manuever to shape a ball or your bread may end up too dense.
- 12
Note 1: You can make this bread without a stand mixer. Mix all ingredients in same way as written above in a large bowl with a wooden spoon. Turn out onto a floured surface and knead by hand for 8 minutes. Continue with remaining steps from there.
Cooksnaps
Keywords
Similar Recipes
More Recipes
-


-

🤎🤍 Father's Day Two-Color Swirl Cookies 🤎🤍

-


-

Spiced Tea with Lemongrass and Black Pepper

-


-


-


-


-

Punjabi Soya-Veggie Pakoda Kadi Platter

-


-


-


-


-


-
-


-


-

-

Brad's Italian style polenta appetizer

-


-


-

 Seeker81
 -
 Ashley T
 -
 Dipsikha Nandi


Comments