Kkakdugi (Cubed Radish Kimchi)
I made this at my daughter's request.
Since the spice of red chili powder varies depending on the type, be sure to check the taste while seasoning. The yangnyeom from Step 14 is enough for 3-4 daikon radishes worth of kkakdugi. Store the leftover yangnyeom in the freezer, then the next time you make kkakdugi, all you have to do is pickle the daikon. Recipe by kanako8224
Steps
- 1
Thoroughly rinse the daikon radish, and peel the skin with a peeler. Set aside the stalk end and root end. Do not discard.

- 2
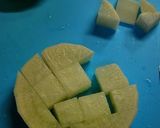
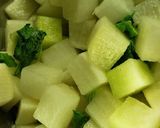
Chop the daikon radish into 2 cm rounds, dice them into 2 cm square cubes, then place them in a large bowl. Set aside the triangular shaped pieces.
- 3
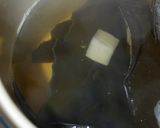
While chopping the daikon into cubes, place the ★ ingredients, the triangular shaped daikon pieces and the root end into a large pot with water to prepare the broth.

- 4
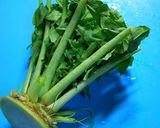
Thoroughly rinse the stalk end, and cut the undamaged leaves into 2 cm lengths.
- 5
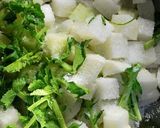
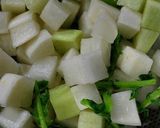
Combine the cubed daikon and the leaves, add salt, lightly toss, and let sit for 1 hour. Do not rub the salt in.
- 6
After 30 minutes, gently toss to evenly distribute the salt. Do not rub the salt in.
- 7
Turn on the heat under the pot from Step 3, reduce it to medium-low heat after bringing it to a boil, then simmer for 30 minutes to make the broth. Do not let it boil.
- 8
After about 1 hour, thoroughly drain the daikon and leaves from Step 6.
- 9
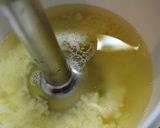
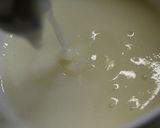
After the broth is finished, prepare the yangnyeom. Put the rice in a bowl, pour in the hot broth, then process with a hand mixer.
- 10
Process the rice and broth from Step 9 into a thick paste-like porridge, and transfer it to a large bowl.
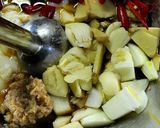
- 11
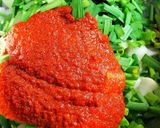
Prepare the ◆ ingredients to add to the porridge from Step 10. Remove the seeds from the red chili peppers, then roughly chop them with the onion, garlic, and ginger to make them easy to process, then add them to the porridge.
- 12
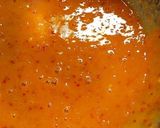
Pulse the porridge with the added ingredients, check to make sure that the red chili peppers are finely processed, then turn off the mixer.
- 13
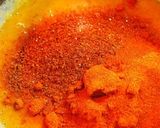
You should be able to buy the Japanese plum extract at a Korean specialty shop. You could also substitute it with sweet syrup or a mild honey, but you will need to adjust the amount of sugar that you add.

- 14
Add the plum extract to the porridge from Step 12, mix well, let it sit for 10 minutes, then stir again. Then the yangnyeom is ready.
- 15
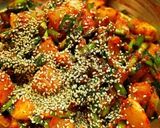
Place the daikon and leaves from Step 8 into a bowl, chop the ☆ ingredients into 2 cm lengths, add them with 250 g of the yangnyeom from Step 14, and evenly combine.
- 16
Gradually mix in the sugar and the salt, and season to taste.

- 17
Add the toasted sesame seeds and mix.
- 18
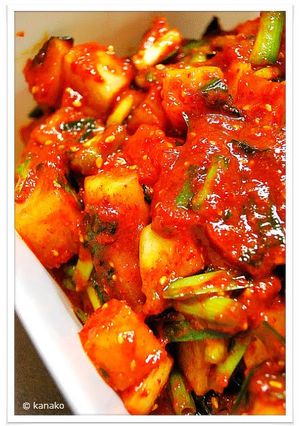
It's done! Enjoy the three distinct flavors of freshly pickled kkakdugi, marinated kkakdugi, and sweetly acidic kkakdugi

- 19
Store it in a Tupperware container with a lid, let it sit for a day at room temperature, then store it in the refrigerator from the next day onwards.

Cooksnaps
Did you know that you can import recipes from anywhere into Cookpad with one click?
https://blog.cookpad.com/us/cookpad-recipe-import-feature-save-recipes-from-anywhere/
Download Cookpad app to plan your meals and store your cooking ideas in one safe place! https://cookpad.wasmer.app/us/download
Similar Recipes
More Recipes
-


-


-


-


-

Jacket Potatoes with Cheese Filling

-

Mango Shrikhand - Aamrakhand - Indian traditional desert

-


-


-


-


-


-


-


-


-


-


-


-


-


-

Triple Chocolate Drizzle Cookies


Comments